Showing posts with label tutorial. Show all posts

Monday, February 24, 2014

Art Journal Every Day - February 2014

Hi everyone!
It's time for a new tutorial and I am really excited about sharing this one

It is really simple and adds lots of texture and dimension to an Art Journal page.The prompt is Faith... so much meaning.
Here is my page:

You can see the tutorial HERE and the prompt HERE.
Supplies:
  • Gesso
  • Art spatula
  • Art Journal
  • Gelatos
  • Pigma pen
  • Paint
  • Baby wipes
  • Spray bottle with water
  • Scraps of designer paper
  • Gel Medium
I would like to enter this project in the following challenges:
Thanks!
Love,
Julia

Monday, January 20, 2014

Art Journal Every Day

Hi everyone!
It's time for a new tutorial and I am really excited about sharing this one

Adding Texture with Tissue Paper
It is really simple and adds lots of texture and dimension to an Art Journal page.The prompt is LOVE... so much meaning.
Here is my page:
Image is Queen Crown from Smeared Ink. I used the stamp set called Quoth The Raven from Smeared Ink, also 


Supplies: Tissue Paper, Acrylic paints - Golden, Golden Gel Medium, Spectrum Noir, Gesso, Krylon Workable Fixative, Signo pigment ink white pen, charcoal and Pen-Touch Gold pen.
You can find the video tutorial HERE, only available through the Smeared and Smudged forum.
I would like to enter this project in the following challenges:
Thanks!
Love,
Julia


Monday, December 16, 2013

Art Journal Every Day

Hi everyone!
Welcome to my first tutorial and prompt for Art Journal Every Day. This is so exciting!
My tutorial is about hand sewing on your art journal page.
Yes I know that it is kind of scary, we work so hard on our pages and then I suggest you go stick a needle on it... well you are going to love it.
Sewing adds texture and dimension to a page. I absolutely love touching my work and finding that something special that grabs my attention.
The prompt is Hope... such a small word and so much meaning.
Here is my page:
 Some details:


Image: Fringe 1 from Smeared Ink
Products used: Acrylic paints - Golden, Golden Gel Medium, Prisma Coloring Pencils, Gesso, India Inks, Yarn, Sewing Needle with big eye, Signo pigment ink white pen, Permapaque Black Marker and Pen-Touch Gold pen.
You can find the video tutorial HERE, only available through the Smeared and Smudged forum.
I would like to enter this project in the following challenges:
Thanks!
Love,
Julia

Thursday, October 31, 2013

31 Days of Halloween 2013: Day 31

Day 31 of 31 Days of Halloween is here!!!
Happy Halloween!
I can't believe it, 31 days... we have had so much fun and have been so inspired by so many talented artist.
Thanks everyone for your amazing creations.
If you came from Carla's blog, then you are on the right track; if not, then please visit Terra's Blog and enjoy the hop.
Today's project is an altered candy holder featuring images from a rubber stamp set designed by Rick St. Dennis for Smeared Ink Rubber Club called Voodoo.


Some details of the process:


Image was stamped on parchment paper with Archival Ink. Images on box were also stamped with Archival Ink.
The box was painted with DecoArt Paints (Orange and Citrus Green).
Now hop over to Steph's blog, she has something special for you.
I would like to enter this project in the following challenges:


                Giveaway Alert!!!
                Remember that there is still time to leave a comment and win one of the handmade jewelry pieces from 31 Days of Halloween, please follow this Links: Day 1 and Day 13!!
                Winners will be posted tomorrow.
                Thanks!
                Love, 
                Julia

                Sunday, October 13, 2013

                31 Days of Halloween 2013: Day 13 with Domino Art

                Day 13 of 31 Days of Halloween is here!!!
                If you came from Carla's blogthen you are on the right track; if not, then please visit Terra's Blog and enjoy the hop.
                I am also part of Domino Art's 31 Days of Halloween Celebration.
                Today's project is an altered domino featuring an image from a rubber stamp set designed by Rick St. Dennis for Smeared Ink Rubber Club called Voodoo.

                The supplies used: 

                Domino game piece

                Golden Paint: Carbon Black

                Black Sharpie Pen

                VersaMark embossing ink pad

                Ultra Thick Embossing Enamel: Black

                Ranger's Glossy Accent

                Perfect Pearls: Metallic

                Voodoo Stamp Set from Smeared Ink Rubber Club
                Designer Paper scrap
                E6000 adhesive
                Metal Spacer
                Assorted beads
                Head pin
                Eye pin 
                The process is really easy:


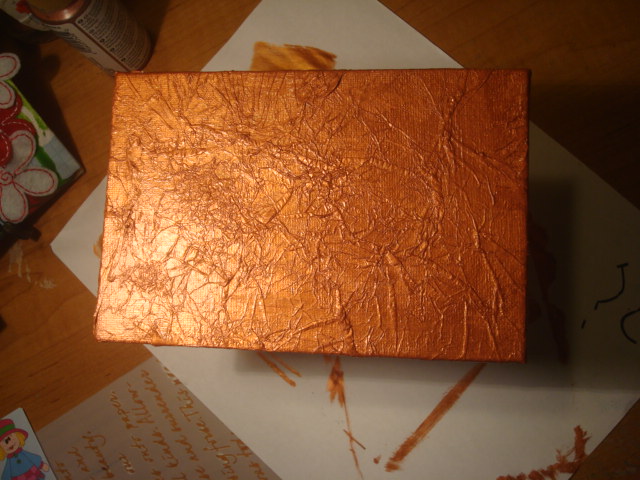
                • Cover the solid side of the domino with VersaMark and add the Black embossing powder.
                • Melt the powder with the heating gun.
                • Repeat this step 2 more times.
                • Cover the surface of the enamel with Metallic Perfect Pearls and heat again, this sets the Perfect Pearls into the enamel. 
                • While the enamel is still hot, press the surface with the stamp, careful not to touch it.
                • Remove the stamp and allow to cool completely before doing anything else to the domino.
                • Once it cools down, the enamel hardens and the stamped image is permanent.
                • Cover the sides of the domino with Golden acrylic paint.
                • Turn over the domino and glue a rectangular piece of scrap paper to this face inserting the eye pin.  Before adhering the scrap of paper to the domino I used a sharpie around the border of paper to add a little black outline. 
                • Cover the surface of the paper with Glossy Accents this seals the paper and protects our works.
                • Once it is dry, decorate with beads.
                • Add a metal spacer to the top, using E6000 adhesive, this is an industrial strength adhesive, resistant to water. 
                Enjoy your new pendant, just imagine the possibilities!
                Now hop over to Steph's blog, she has something special for you.
                I would like to enter this project in the following challenges:
                Thanks!
                Love,
                Julia

                Thursday, June 27, 2013

                Robotics 2 // Out of this world and a Tutorial

                Hello Everyone!
                I'm sharing today a very simple technique for creating backgrounds using acrylic paints and plastic wrap tissue paper. Many crafters use this technique, but I am sharing how I do it, and hope that you will try it.
                Supplies:
                Tissue paper
                Gel Medium
                Mini canvas
                Acrylic paints: Bronze
                Gelatos
                Painting Brush
                Procedure:
                • Give a base coat of bronze acrylic paint to mini canvas.
                • Tear white tissue paper and crumple.
                • Open gently, you don't want to loss all the fabulous folds.
                • Cover the canvas with gel medium.
                • Add the paper, careful to maintain the folds.
                • Seal the paper with gel medium, be gentle with the brush, we don't want to tear the paper.
                • Allow to dry.
                • Paint this complete surface with bronze acrylic paint.
                • Color the raised surface with a turquoise Gelatos.
                • Add a little turquoise paint, I like to use my fingers, feel that I have more control of the amount of paint added.
                • Allow to dry.
                • Adhere your colored image and Sentiment with gel medium.
                • Add your decorations.
                Here is the final project:
                Image used: Robotics 2 // Out of this world
                Hope you liked the tutorial and have fun creating.
                I would like to enter this project in the following challenges:
                Thanks!
                Love,
                Julia

                Tuesday, May 28, 2013

                Inferno and a background tutorial!

                Hello Everyone!
                I'm sharing today a very simple technique for creating backgrounds using acrylic paints and plastic wrap. Many crafters use this technique, but I am sharing how I do it, and hope that you will try it.
                Supplies:

                • watercolor paper
                • acrylic paints
                • water
                • paintbrushes
                • plastic wrap
                • small mixing container

                Procedure:
                • Pour some acrylic paint into the container and add water.
                • Mix well. For this project I thinned down the paint a lot, wanted the colors to be translucent.
                • Add the diluted paints randomly to the paper.
                • Place the plastic wrap over the paint . Squeeze and move it around creating folds as you go.
                • Leave the plastic wrap over the paper and set aside to dry, approximately 24 hours. Here is where you have to be patient.
                • Once completely dry, remove the plastic wrap.
                • Optional: add some shimmer with Perfect Pearls Mist.
                I used the background for a fat page featuring one of Rick's images called Inferno. You can find this image and many more in Rick St. Dennis Etsy Store.
                The image was colored with Spectrum Noir alcohol pens and Prisma Coloring Pencils.
                I used grungeboard for the embellies and colored them using Black Soot Distress Ink. Added the silver accent with acrylic paint and applying it with my fingers.
                Hope you liked the tutorial and have fun creating.
                Related Posts Plugin for WordPress, Blogger...